

The booth is designed to catch the eye from across the hall. The reception area is meant to convey the brand’s character before a single word is spoken. The product prototype must end up in the hands of the team—not remain just another file on a hard drive. In situations like these, custom large-format 3D printing isn’t just a technological curiosity—it’s a way to turn a vision into an object that can be seen, touched, and used.
For a brand, agency, or designer, it’s not just about “printing something big.” What matters is the end result: the right scale, proportions, durability, surface aesthetics, and the assurance that the piece will arrive at its destination in one piece. That is why the execution requires a combination of design sensibility and technical control at every stage.
When a Large 3D Object Makes Sense
Large-format designs work particularly well when the product or message is meant to make an impact in a physical space. This could be a sculpture for a storefront, an element of event set design, an architectural model, a prototype enclosure, a prop for a photo shoot, or a logo that, when illuminated by LEDs, becomes the focal point of an interior.
3D printing offers an advantage over mass-produced solutions when a design doesn’t fit into a catalog of off-the-shelf products. There’s no need to adapt your idea to a mold available from the manufacturer. You can create an object with a specific shape, size, and characteristics, and then adapt its design to the method of display, transport, or assembly.
That doesn’t mean 3D printing will always be the best method. A simple batch of identical, small parts may be better suited to traditional manufacturing. However, when a unique shape, rapid prototyping, or an object with non-standard geometry is required, additive manufacturing allows you to bypass the costly preparation of molds and tools.
Custom large-format 3D printing starts with a brief
A good 3D file makes it easier to get started, but it isn’t a prerequisite for beginning a conversation. Sometimes the starting point is a sketch, a visualization, a vector logo, a concept model, or simply a clearly described goal. The most important question is: where and how will your object be used?
A freestanding display at a trade show has different requirements than an installation mounted high on a wall. A model viewed from a distance of several meters can be designed differently than an object that customers will touch. Environmental conditions, the planned display duration, access to power for backlighting, and limitations related to bringing the finished display into the venue or onto the stage are also important factors.
During the quoting stage, it’s helpful to provide the target dimensions, deadline, intended use, reference materials, and information about the desired finish. This ensures that the quote isn’t just a guess based on a price “per kilogram of plastic.” Instead, it reflects the actual scope of work: geometry preparation, print time, potential division into modules, post-processing, painting, LED electronics, packaging, and shipping.
The scale changes more than is apparent in the visualization
Scaling up a model isn’t just a matter of entering a larger number into the software. A wall that works well in a small figure may need to be reinforced when used in a large object. You need to assess the stress points, the center of gravity, the joints, and the anchoring method. If the form is to be hollow inside, the structure must maintain its rigidity without unnecessarily increasing its weight.
Large-scale projects are often printed as fitted segments. This is a practical solution, not an aesthetic compromise. A properly planned division facilitates production, transportation, and installation, and once assembled, results in a cohesive, final form. It is crucial to design the joints so that they ensure durability and do not detract from the overall appearance.
From a model to a physical object
The process begins with a design review. The geometry must be technically sound: free of accidental holes, inverted surfaces, sections that are too thin, or details that cannot be reliably reproduced at the intended scale. At the same time, the print orientation and support structure are determined, as they affect surface quality, strength, and production time.
At Janko Sculptures, we work with open-source 3D printers that we build and configure ourselves for demanding projects. This gives us control over the parameters that matter for large-format prints: temperature, process stability, layer adhesion, and part repeatability. For the client, this translates into one specific result: the project is tailored to their specific application, rather than being constrained by the limitations of a randomly available machine.
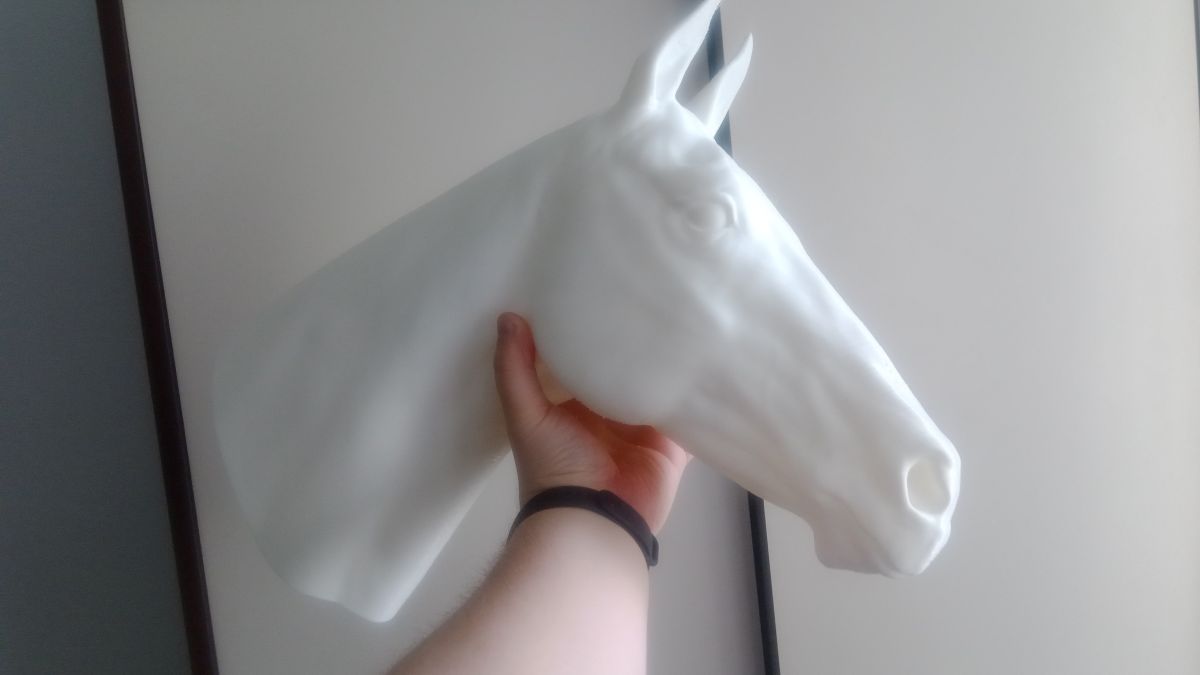
After printing comes a stage that often determines how the final product is perceived. A rough, layered surface can be an intentional aesthetic element, especially in industrial-style designs. However, if the object is meant to look like a smooth sculpture, a premium item, or part of a retail display, it requires further processing. Depending on the project specifications, this process includes joining modules, sanding, filling, priming, painting, and preparing them for installation.
Not every detail needs to be polished to perfection. Sometimes the visible texture of the print highlights the digital origin of the design and creates an interesting contrast with the elegant interior. In other cases, the priority will be a uniform, painted surface. The right decision depends on how close the viewer will be to the object, what kind of light will fall on it, and what the brand wants to convey.
Choose the material and finish based on the application
The material should be chosen based on its function, not solely on the color of the sample. A lightweight decorative element for a one-time event has different requirements than a permanent logo installed on the premises. For projects that involve frequent transport, the structural strength is what matters most. For projects with high visual standards, preparing the surface for further finishing may be more important.
If a project requires small, highly precise details or a different type of material, resin castings can be used to complement the 3D printing process. This approach allows you to choose the right technology for a specific part of the project, rather than trying to force everything to be done using a single method. The best result doesn’t always come from a single material—it’s often a carefully planned combination of processes.
It’s a good idea to take LED lighting into account as early as the design phase. Wires, power supplies, mounting points, and service access should not be improvised after production has been completed. A well-designed LED logo does more than just light up. It maintains the right proportions, clarity, and even lighting, thereby enhancing the brand’s visual identity even after dark.
What to Expect from a Fair Appraisal
The price of a large-format project depends on its scale, geometry, number of parts, material, level of processing, and deadline. Two projects of similar size may require completely different amounts of work. An openwork sculpture with fine details, a multi-part illuminated letter, and a simple display structure are three distinct production tasks.
It’s worth viewing a custom quote as part of the design process, not as an obstacle to making a purchase. It helps you identify what truly creates value for your project. Sometimes it’s better to spend your budget on a more refined finish for the front surface than on details that aren’t visible. In other cases, changing the model’s partition reduces transportation costs without affecting the visual result.
A clearly defined schedule is also important. The production of a large item involves the time required for printing, processing, drying the successive layers of finish, quality control, and securing the shipment. A tight deadline is possible in many cases, but it’s best not to wait until the opening of the venue or event is just a few days away.
Safe delivery is part of the fulfillment process
A large, custom object doesn’t stop moving once it’s removed from the printer. It must be properly secured for transport. Packaging takes into account the shape, protruding parts, weight, and susceptibility of the surface to scratches. For modular projects, it is also important to clearly label the parts and provide assembly instructions if the assembly is to be performed by the customer.
Domestic and international shipping requires just as much practical thinking as production. The goal is not just to ship a package, but to deliver a finished product in a condition that allows it to be immediately put on display or assembled. That is why, when designing a large-format piece, it’s a good idea to consider the journey from the studio to the final destination right from the start.
If you have a sketch, a rendering, a 3D file, or an idea that’s difficult to describe in technical terms at this point, start by showing its purpose and scale. The rest can be translated into specific parameters, production stages, and a venue that will truly make room for your brand in the space.